This weeks tip is a big money saver. For the readers who are not familiar with the Excalibur brand dehydrators, let me say, they are often referred to as the best ones out there for personal use. They also make a few industry standard models for commercial production. However like most products that are the "best", their prices can be prohibitive.
One of the best selling accessories from Excalibur are their ParaFlexx sheets. These are liners that go over the trays which will allow you to pour liquid, semi-liquid, or small sized items onto the trays without falling or dripping through the trays all together.
The two big problems with ParaFlexx are:
- ParaFlexx sheets cost anywhere from $5-$9 per sheet depending on the size and the seller.
- ParaFlexx sheets are made specifically for Excalibur trays, and do not fit onto other model dehydrators (Oster, Nesco, Ronco, Magic Chef, etc.)
Here is the solution, Enjoy.
(Legal Disclosure: This solution is not organic, it does require your food coming in contact with plastic sheeting, it is not industry standard, and the FDA would not approve this as a method if you tried selling food to others. However, for years before providing ready made meals to friends and family, this was the way I preferred to dehydrate liquid and semi-liquid foods. If you would like a cheap, reliable, great way to dehydrate products which do not work on a traditional mesh tray, this may be a viable option for you.)
This is the material I have used in the past. There are a few common companies that make similar products and all will work, this just happens to be the cheapest. Note the thickness is 4 mil. This is important for a very specific reason which you will see in the later steps.

From this giant roll you will cut a small square around the size of your trays. Trace your tray with a marker to get the template.
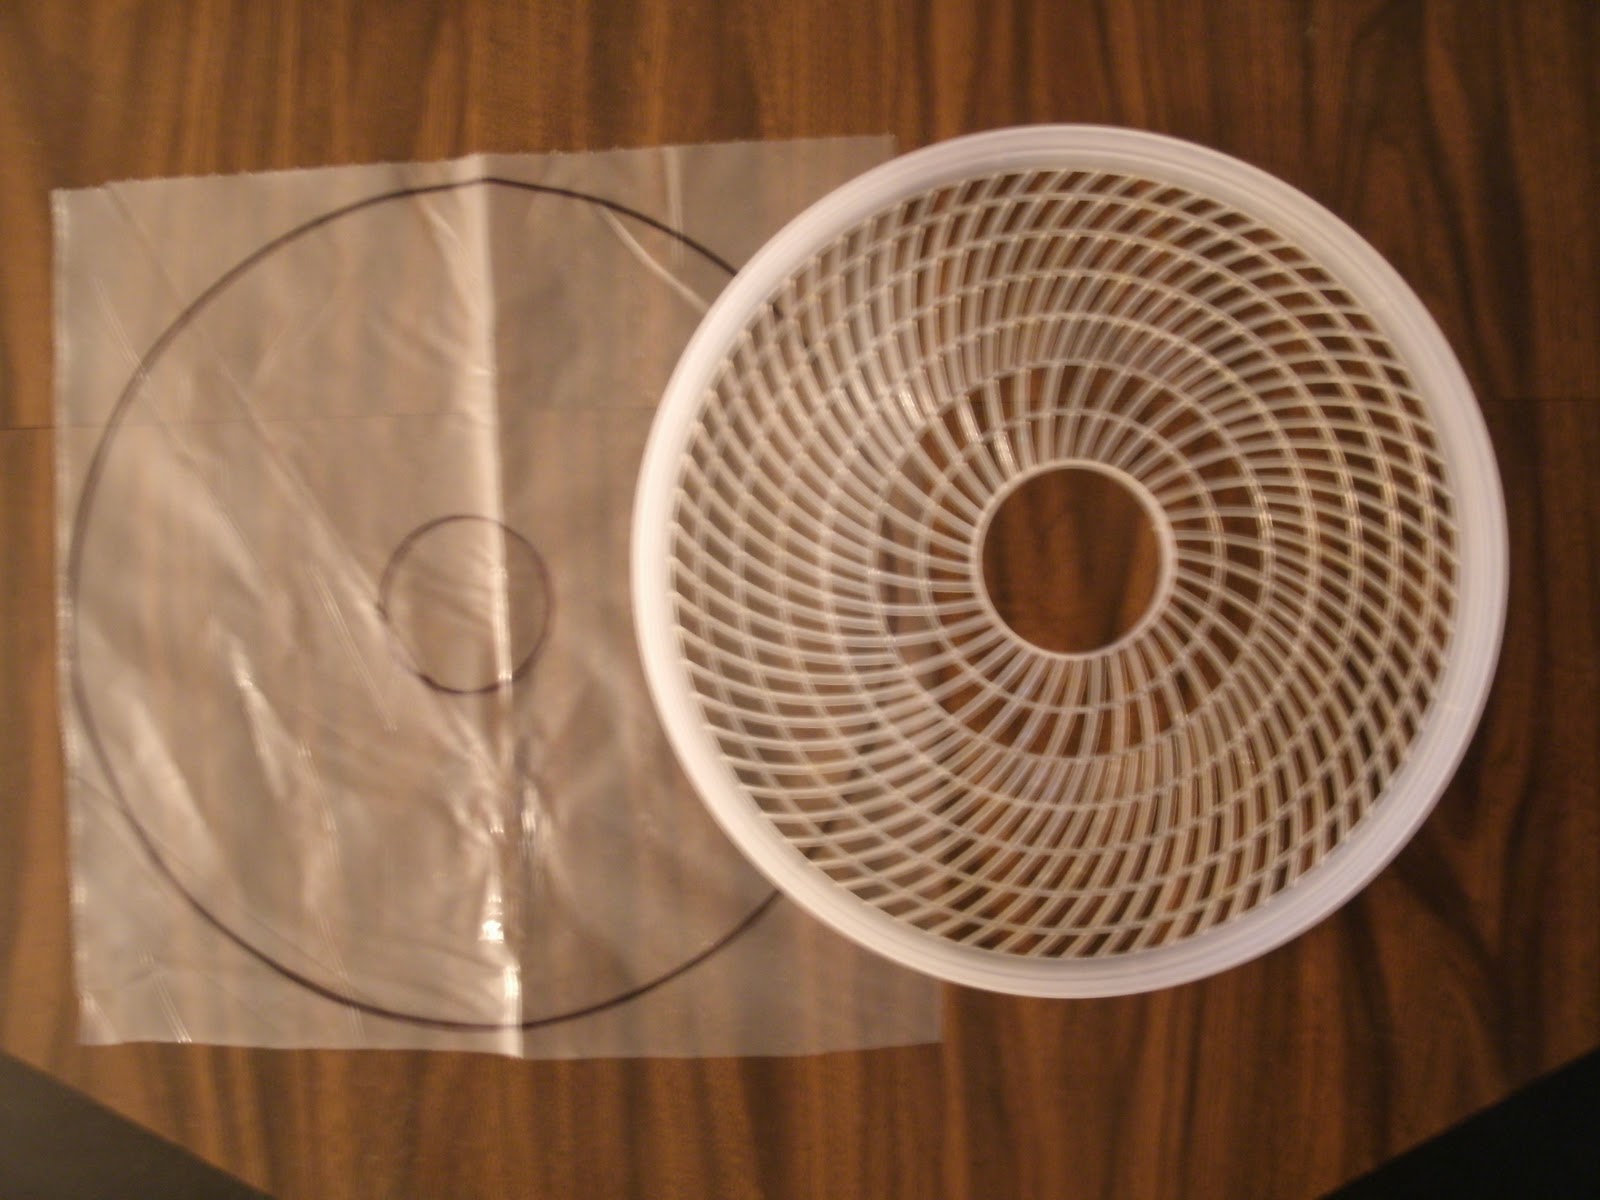
Cut the template out. You will see that I cut along the inside of the outer wall line, and along the outside of the line on the inner circle. I like to remove all areas where the marker ink was to avoid possible ill effects of sharpie ink on my food.

You will now want to consider cutting off a strip from one or two sides to allow for air flow. When using the doughnut shaped tray the theory is the air will flow through the middle channel, but I like to increase the amount of air reaching each part of the tray. The faster the food dries, the less time it is susceptible to staying in a moist warm environment perfect for bacterial growth. I highly recommend sacrificing a small amount of tray surface area to allow for faster drying.

Again cut along the inside of the marker lines.

This liner will now fir your tray perfectly. Because you traced along the outside diameter, and because the inside diameter is slightly smaller, this will allow for the plastic to slope upwards along the rim of the tray creating a lip, which is very beneficial for a clean experience while dehydrating liquid and semi-liquid items.

What is advantageous about the 4 mil. thickness?
When making dehydrated food for personal use years ago I had 3 Oster dehydrator, each had 5 trays, and each tray had at least 2 liners to go with it. I used a grand total of about 1/3 of the roll of plastic. The remaining 2/3 was used for packaging my dried foods for hiking and camping trips. For obvious reasons a #10 can is not the best choice for back packing, and in many situations, using $20 of mylar for a trip 2 weeks from the time of food production seemed wasteful. However, with the addition of my food saver and oxygen absorbers I was able to create custom sized bags by sealing pieces of this plastic together with the sealing mechanism of the food saver. (Custom bags like this will not "vacuum" and therefore need the assistance of the O2 absorber). In these bags you would add the food and an oxygen absorber to create a very good option for back packing. 4 mil plastic seals well, is incredibly strong, and at $9 for 250 Sq. Ft. is cheap enough to omit in your overall budget. If you use 6 or 8 mil. you may start to see failures in the seals as the material is just a little too thick.